


Canning has always had a special place in my heart. It takes me back to my childhood when time spent with my Granny meant three things: gardening, cooking, and “putting up” food (that’s how Appalachians referred to canning). That time was special not only because it meant I got to be the person I loved most in the world, but also because I was learning skills that would form the foundation of the person I would become as an adult.
Last July, I began rebuilding my canning pantry with an old favorite, bread & butter pickles. After I talked to him about a return to canning for more than a year, my partner Rob set up shelves in a cool, dark corner in the basement that I immediately stocked with canning jars, lids, and equipment. I can’t tell you how centered I have felt since that day.
Needless to say, as I begin canning a few months worth of chicken soup, I can’t help but feel nostalgic. As was the case for much of the canning I learned in those early years, it isn’t a very technical or difficult process. I’m going to bring you along with me as I take it step-by-step.
1. Roasting the Chicken (Day 1)
A few weeks ago I came across as ridiculous deal on whole roasters at my local grocer and grabbed four 5-pound birds for $4.20 each. For this project I am using two of them, for a total of $8.40. To prep them for the oven, I rubbed them down with oil before seasoning them with salt, oregano, and a smoky Applewood seasoning I had on hand. I’ll account for their estimated cost in the final cost breakdown later.
I gave them each their own roasting pan to ensure that I saved as much of the drippings as I could, as they roasted at 425°F / 218°C.
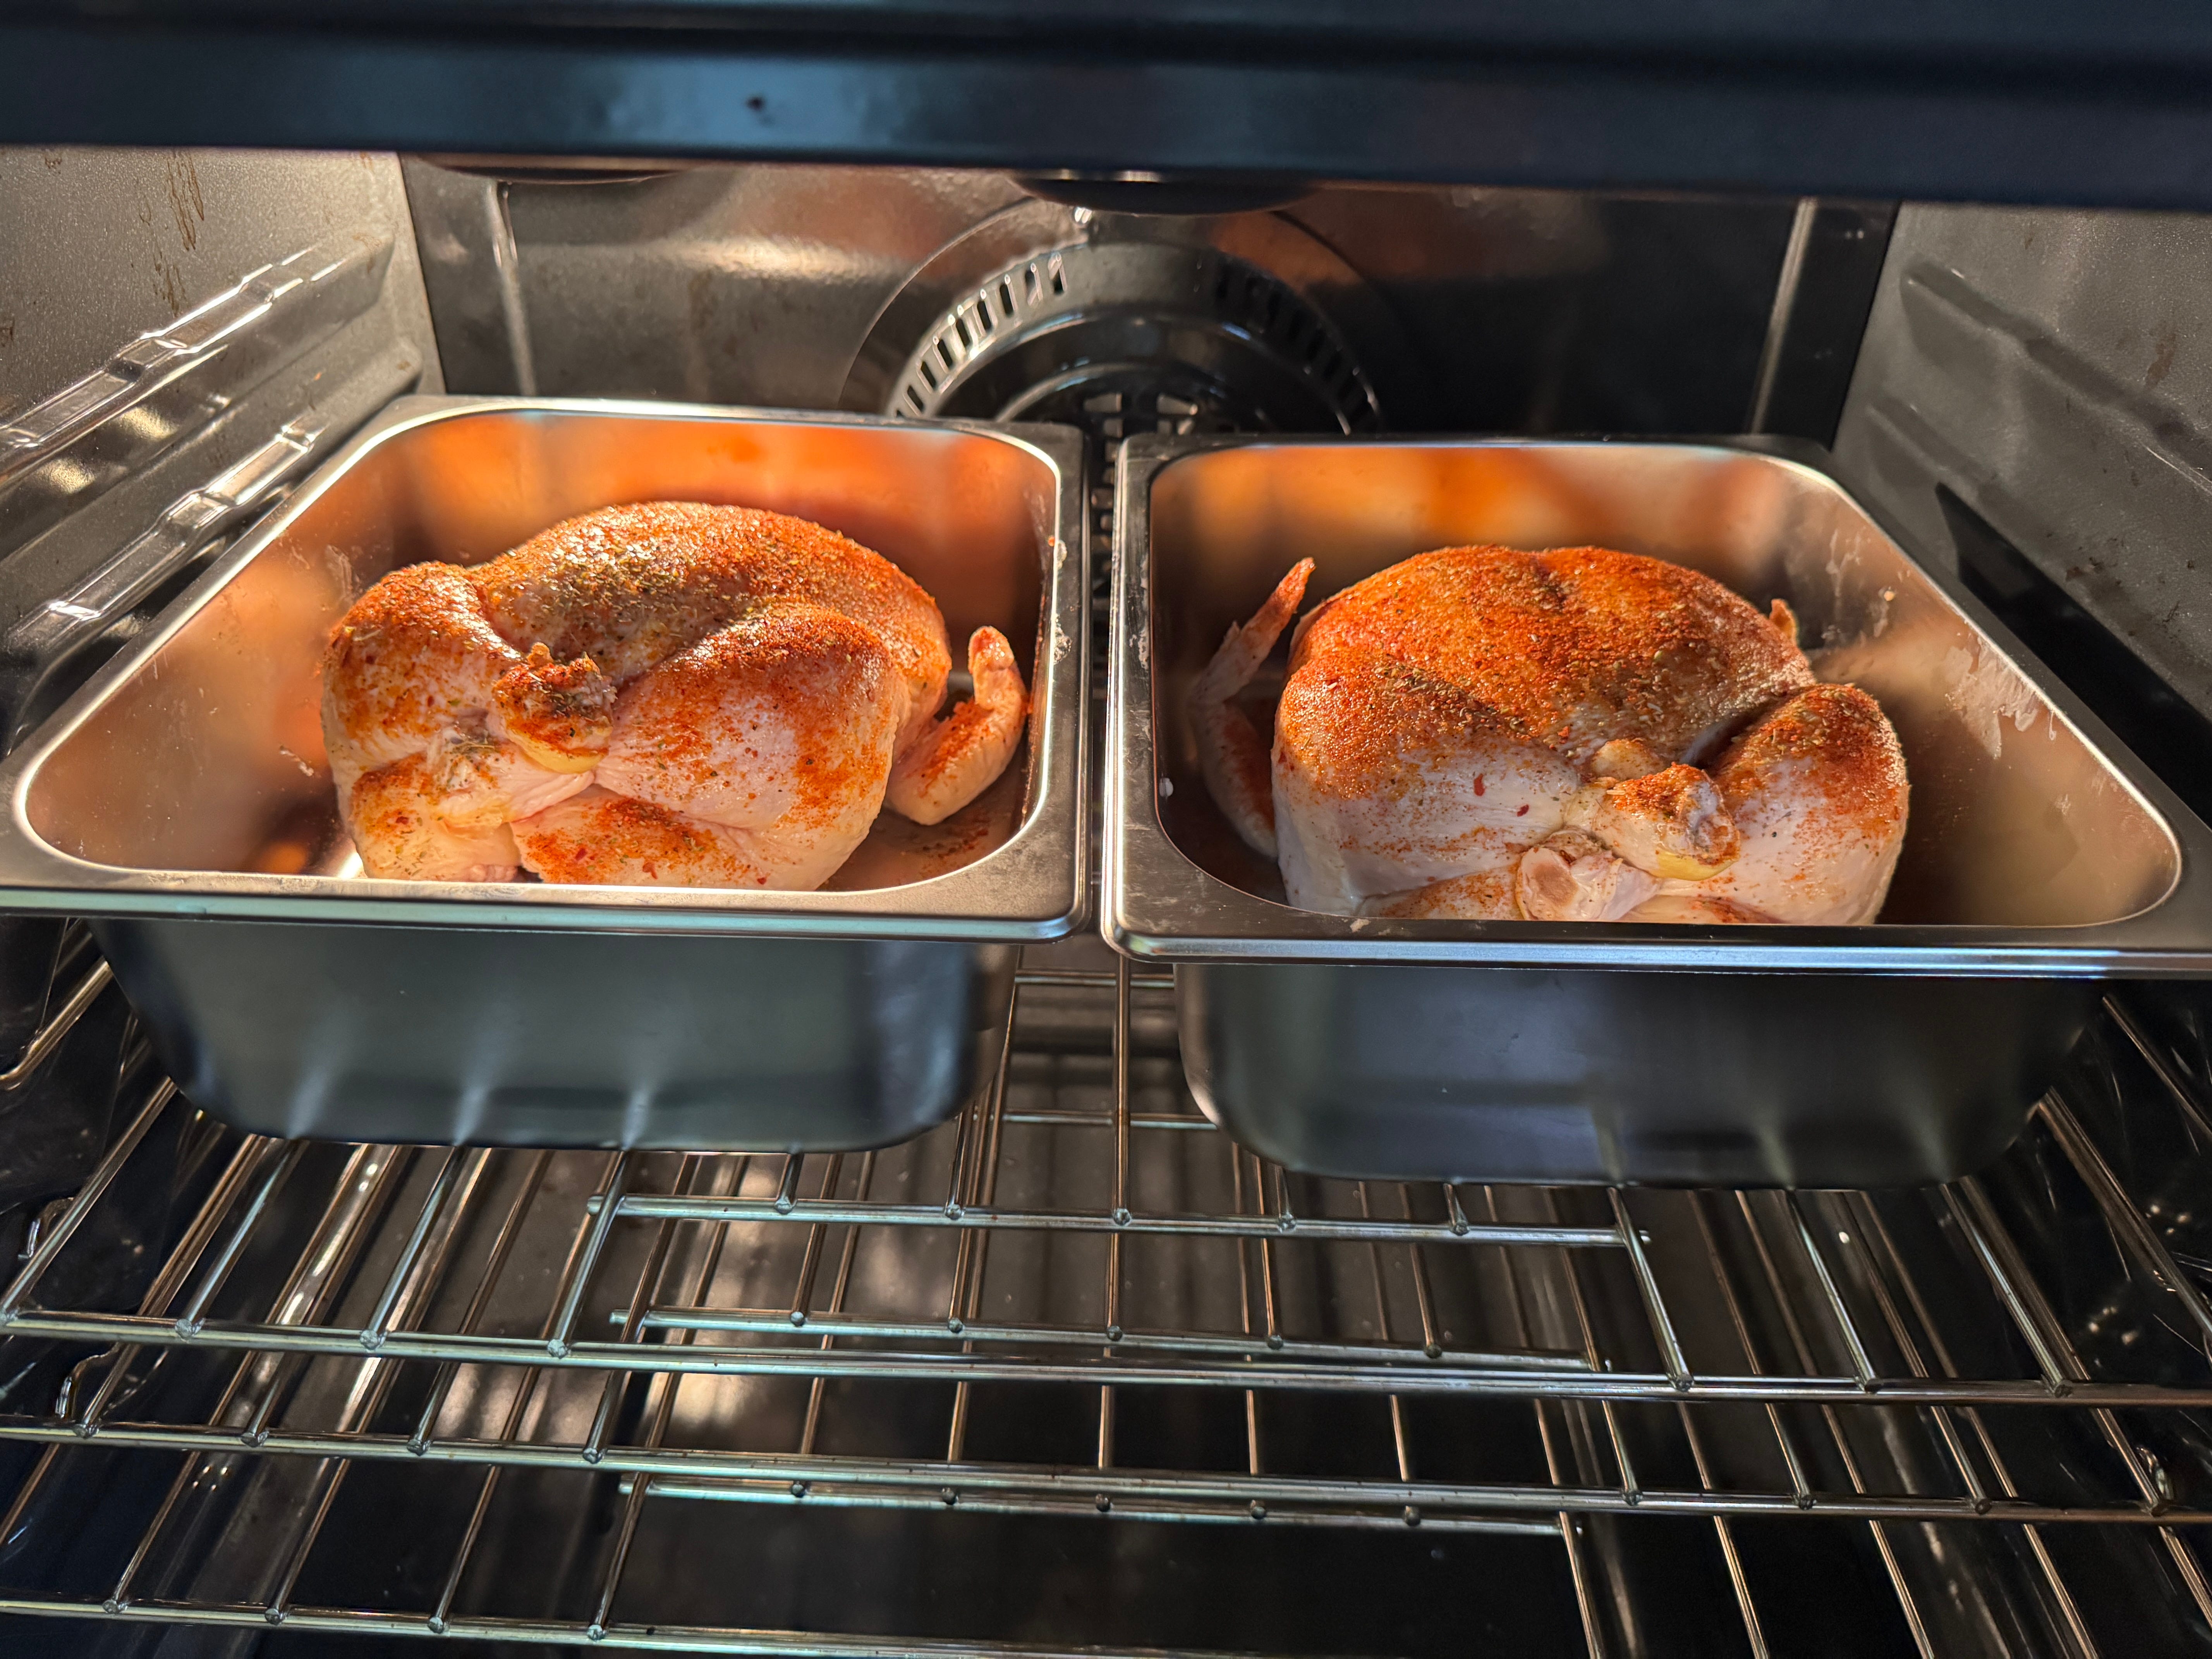
After 45 minutes, the instant read thermometer showed that the breasts had reached 145°F at which time I take the pans out of the oven. For general purposes, you want the breasts to be between 150-155°F. I know what I’m doing, and I know the birds will continue to cook to the proper temperature, but even if they didn’t, the meat will be pressure cooked in the jars for 90 minutes.
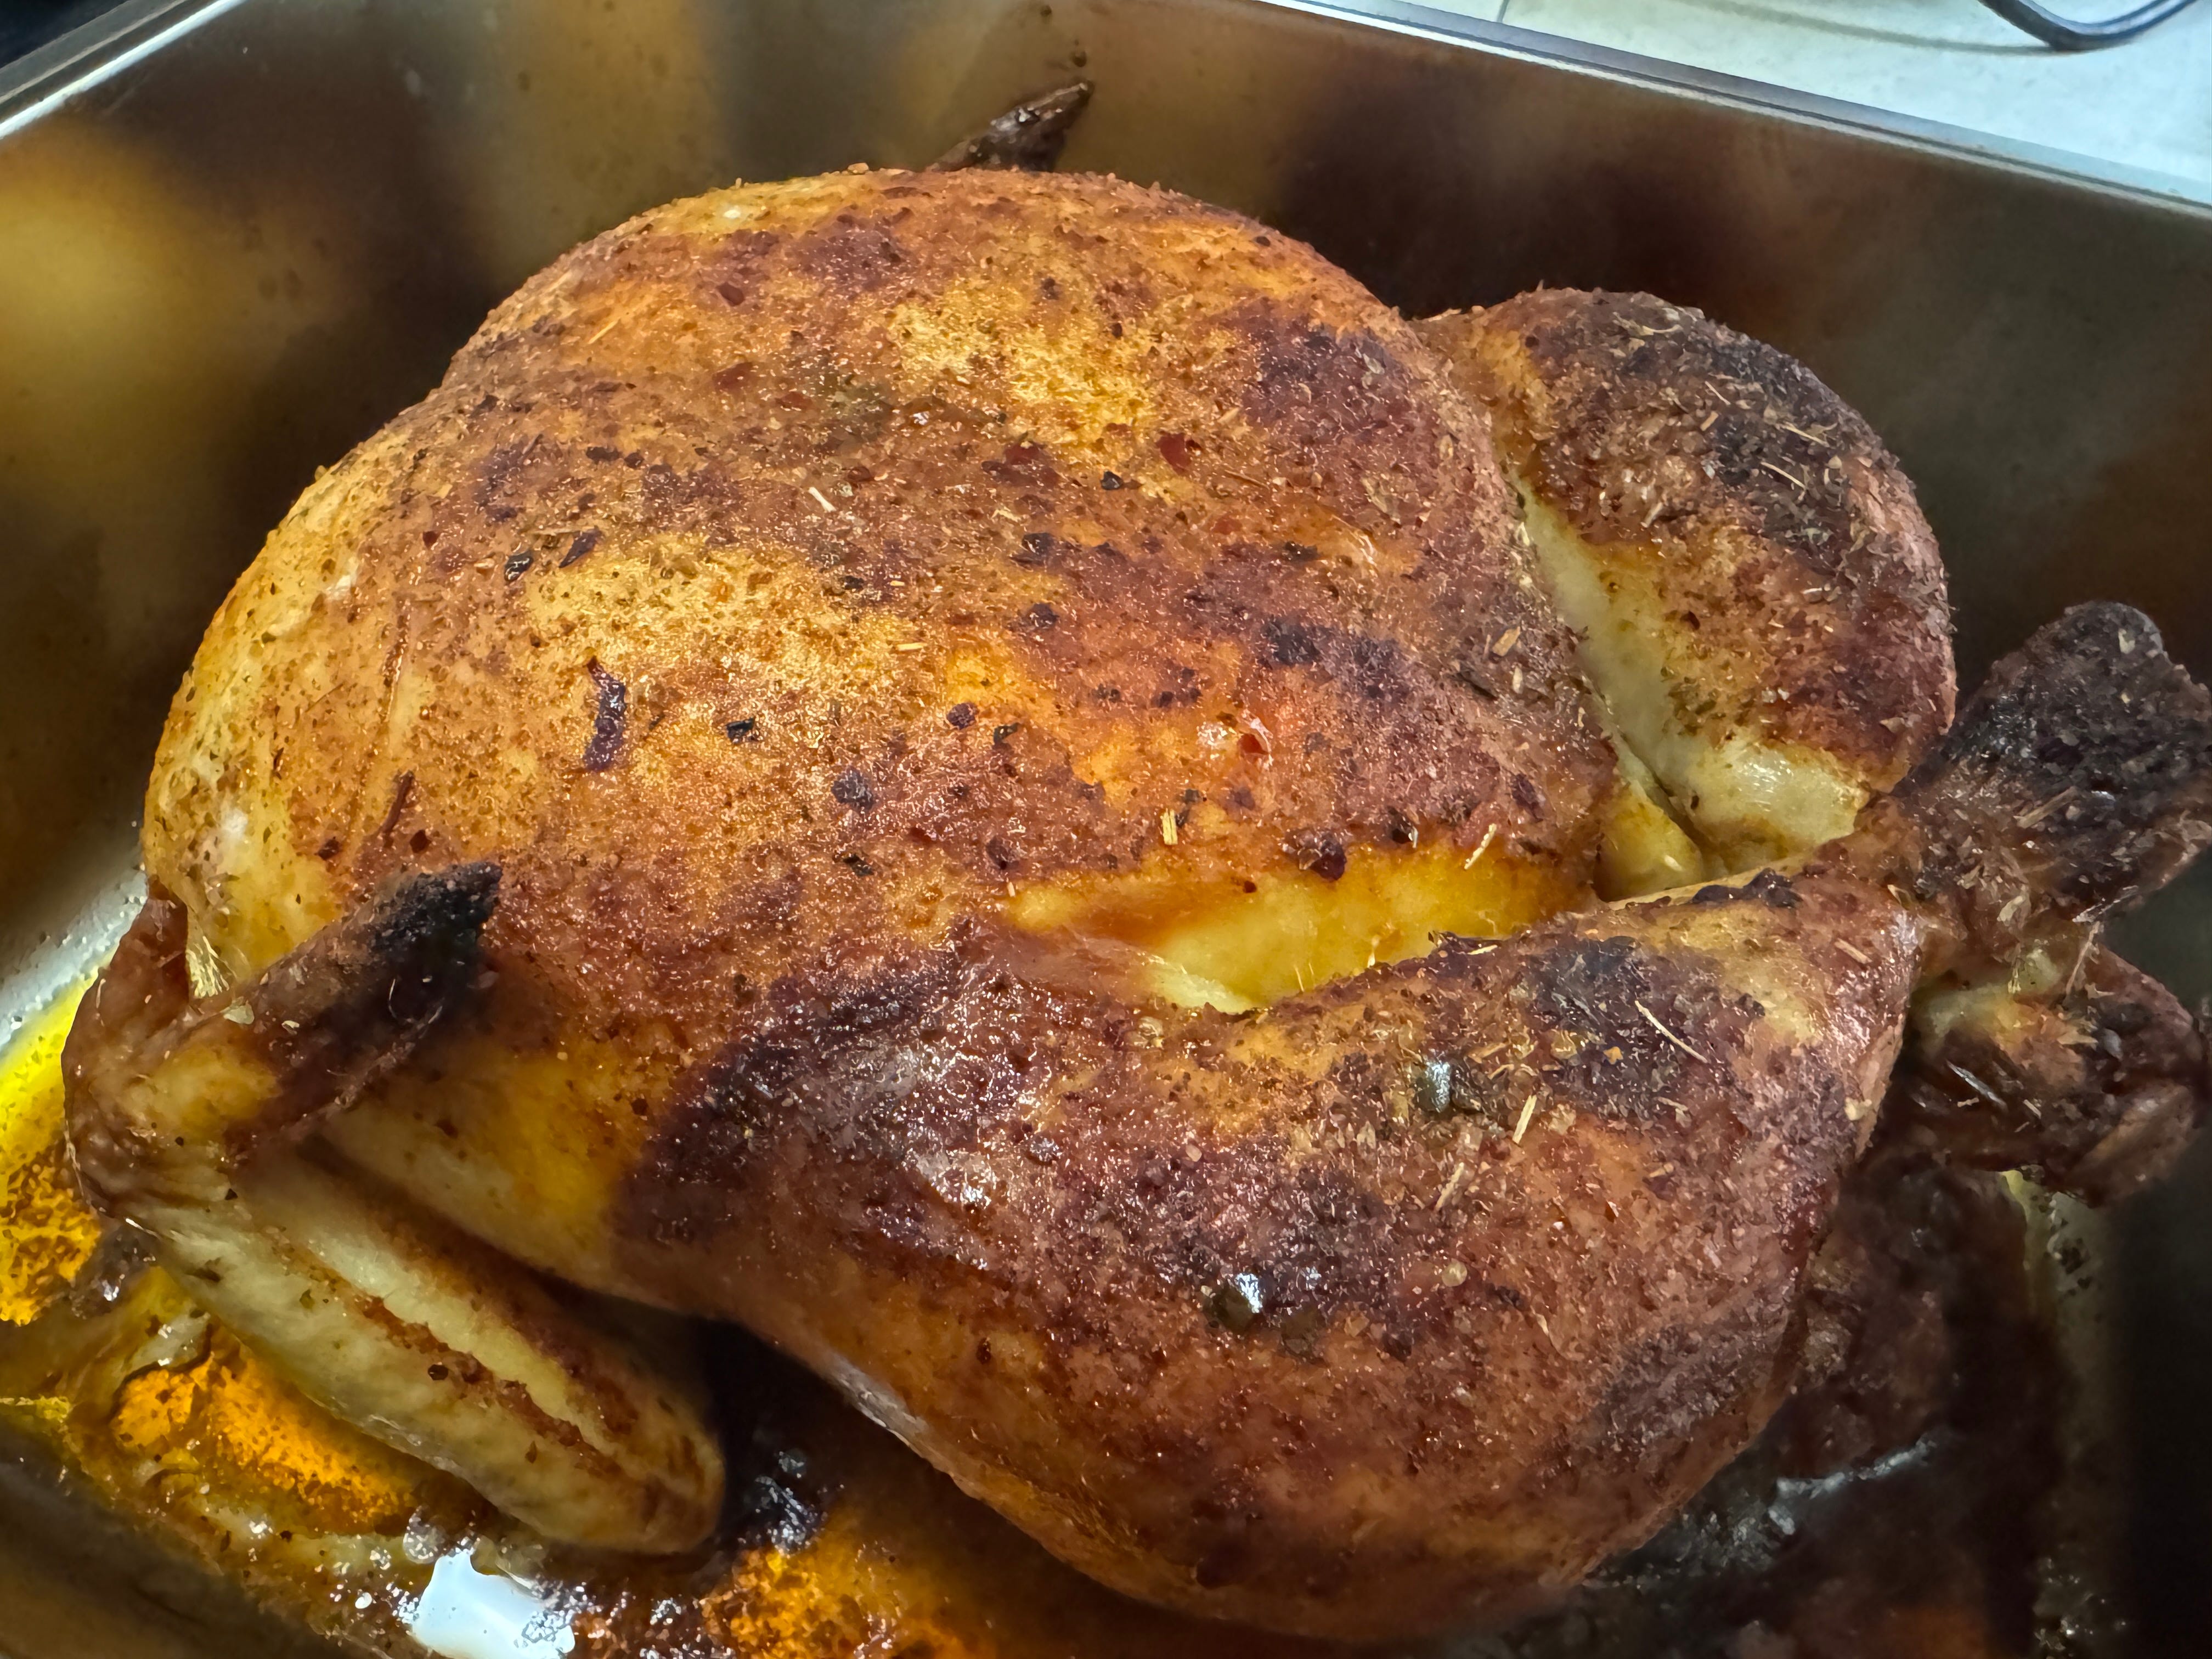
Proper technique tells us to let a roasted chicken rest for 15-20 minutes to retain maximum moisture, but most of the time I do a step better by allowing the chicken to cool completely before pulling the meat. That’s what I’m doing in this case.
2. Making the Stock (Day 1)
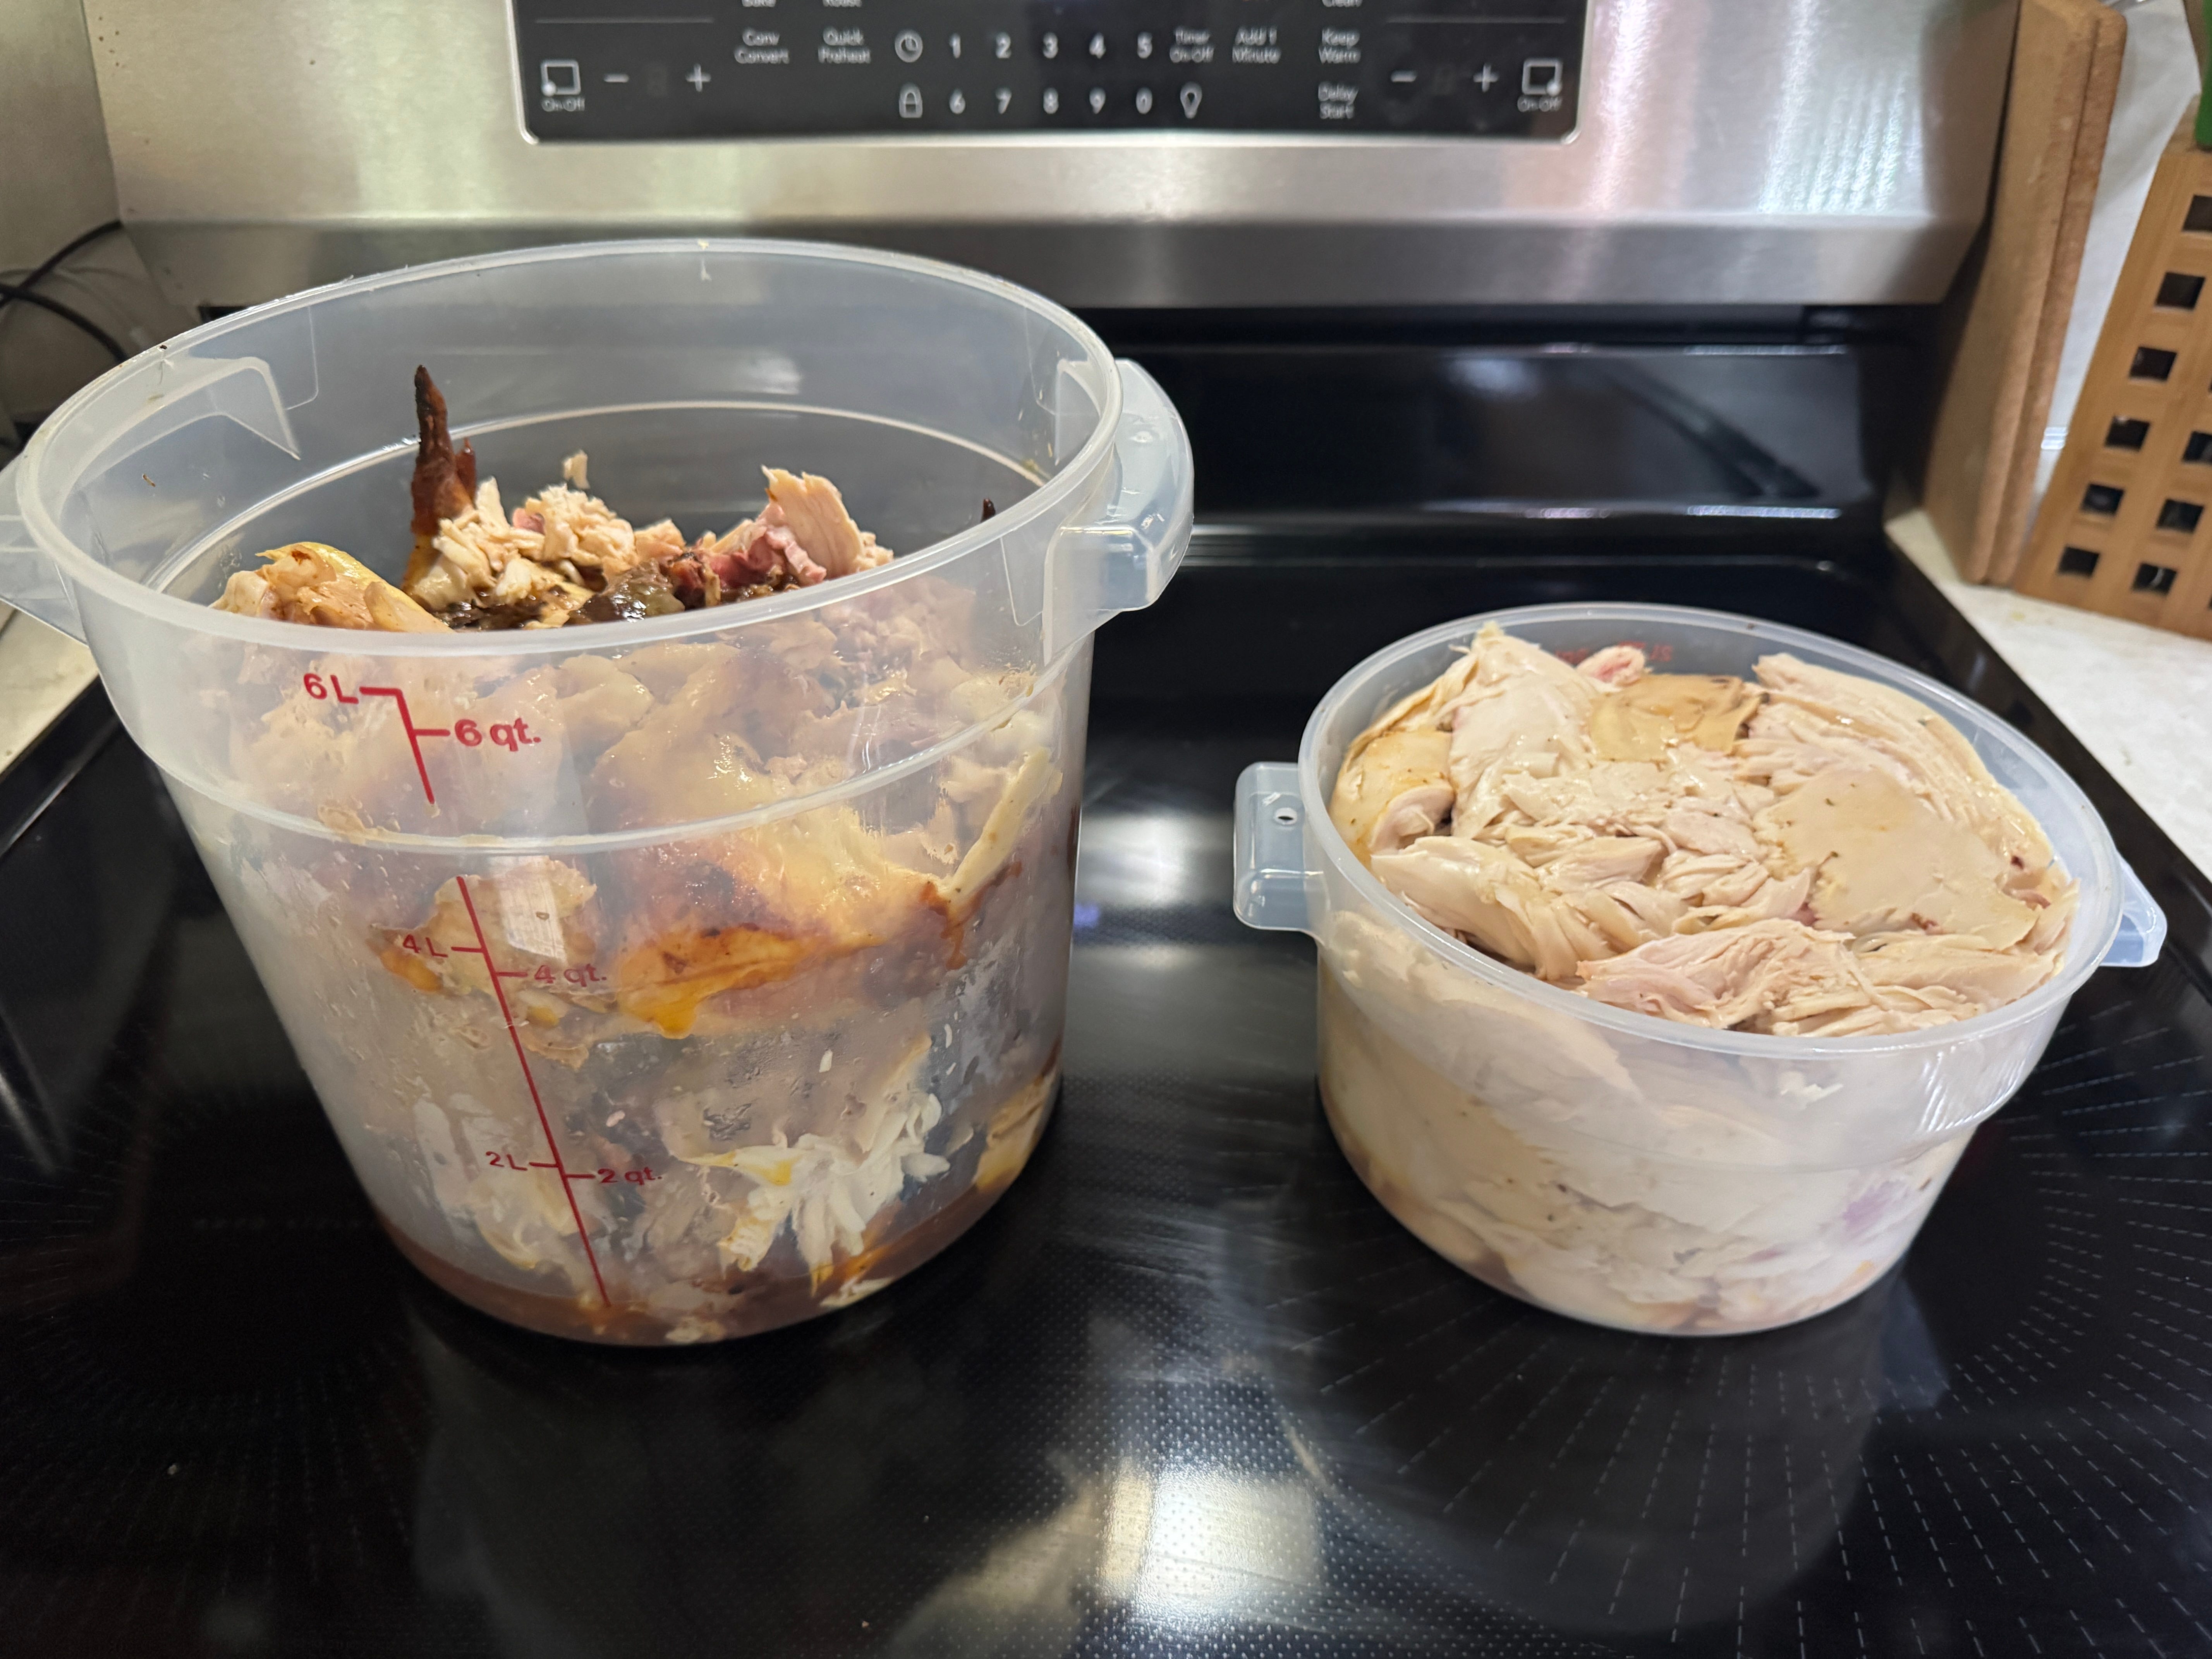
When the roasters have cooled down, I debone them, reserving the carcass for the next step in the process, making the flavorful stock (in the Instant Pot!) that will complete the soup. I recently learned a game-changing method for stock making from Chris Young and I’ll be honest, I don’t think I’ll ever go back.
I’m not using rotisserie chickens this time, but I generally follow Chris’ recipe because it results in a consistent and flavorful stock with almost no prep work. One final point on the stock itself. After it’s made, I cool it down and chill it in the refrigerator to skim off the fat layer. I will render this into schmaltz later.
3. Assembling the Soup (Day 2)
This is where I diverge from what many others do, because I don’t make the soup before canning. I assemble exactly the amount of ingredients I want in each jar. I found that when I tried to do it the other way, I wasn’t getting good distribution of chicken and vegetables in each jar.
Into each quart jar, I layer:
1 Tablespoon apple cider vinegar (see how I made it myself)
1/2 teaspoon salt
1/4 teaspoon black pepper
1 cup pulled or diced chicken
1/2 cup diced carrot
1/2 cup diced onion
1/2 cup diced potato
1/2 cup peas
1 1/2 cups stock (remainder topped off with water)
AUTHOR’S NOTE: A glance at these ingredients may appear that I don’t know how to season my food, but I promise I know what I’m doing and anyone who has ever eaten anything I have cooked in the last 30 years will attest that I don’t do bland. All the flavor of the salt, oregano, and Applewood seasoning I used as a rub is in the stock and it is a flavor bomb. Trust and believe.
When I work in the kitchen, organization is at the top of my list of priorities. That means before I start, I practice the French culinary term mise en place. In short, it means that before you do something in the kitchen you put everything in place. All of the ingredients are fully prepared and laid out on the counter in containers that make using them quick. This not only ensures that I don’t miss adding something to a jar, but also creates an efficient assembly line.
4. Processing the Jars (Day 2)
My old tried & true stovetop pressure canner doesn’t work with the induction cooktop at Rob’s house, so I used my Nesco 9.5 quart electric pressure canner for this project. The downside to the Nesco is that it can only process 4 quart jars at a time, but that inconvenience is offset by being able to set the digital timer and walk away without the need to constantly monitor pressure manually.


I’m canning this soup in wide mouth quart jars, processing for 90 minutes. Pints would go for 75 minutes if I was using them. When processing is finished, I transfer the jars to the counter to cool completely. Once fully cooled down, the lids should pop! and create a vacuum seal. Any jars that don’t seal go to the refrigerator to be used sooner. If by some change multiple jars don’t seal, I will transfer the soup to freezer-safe containers and store them that way.
5. Cost Breakdown and Yield
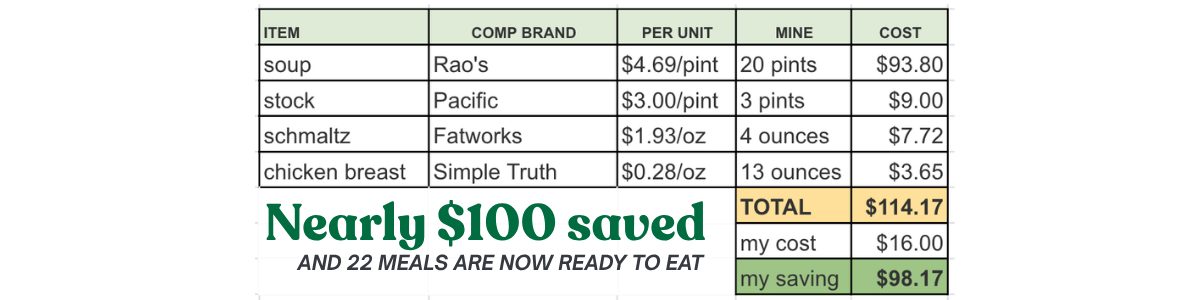
After everything was accounted for, here is what I spent on the ingredients to make months worth of chicken soup from scratch:
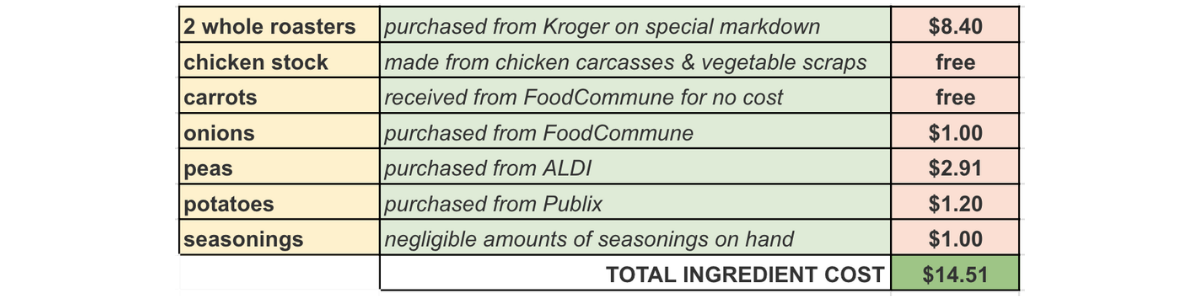
Breaking down the ingredient cost is something my analytical brain requires as part of projects like these. I don’t generally account for water, time or energy because I’m not terribly concerned about those costs. But in the interest of sharing all available info with you, I did some research:
WATER
Water here costs $0.00385/gallon. If I (over)estimate that I used 5 gallons at a cost of $0.19.ENERGY
Energy here costs $0.16/kwh, on average (the rate is lower overnight). Thanks to some analysis by Rob, I was able to get really close to actual use and cost. This project used $1.30 in electricity between the oven (roasting the chickens), two Instant Pots (making the stock), and the canner.TIME
I spent a lot of time on this project, but that time was doing something I really enjoy that ultimately feeds me and my family for months to come. For that reason, I’m not figuring time expenditure.TOTAL MISC. COSTS: $16.00
When everything is accounted for, I finished the day with:
10 quarts chicken soup
3 pints chicken stock
1 large 13oz chicken breast left over to eat during the week
4 oz rendered chicken fat (schmaltz)
Wrap Up & Final Tally
Because of the pre-planning involved, this was easily one of the smoothest and least labor-intensive canning projects I’ve done from scratch. Even though I started the day with all of the components prepped, it was an all-day affair because the electric canner can only process 4 quarts at a time. On a positive note, the electric canner greatly reduces the heat and humidity buildup in the kitchen compared to the heat and steam emanating from a large metal stovetop canner.
I offer my food posts freely, because I don’t think cost should be an obstacle to accessing solid information on shopping, preparing, cooking, and preserving good food. If you find this content useful, please consider supporting my work by subscribing or leaving a tip.